Locations for inserting glucose sensors
Guardian™ Sensor 3
Gather all of your supplies to insert your sensor. After you have them, you will choose a site to insert your sensor. Choose a site that has enough fat.
Shown are the recommended body areas (shaded) for sensor insertion:
NOTE: Assistance will likely be needed for sensor insertion into the back of the upper arm and into the buttocks. Some users found it difficult to insert the sensor into their arm and buttocks by themselves.
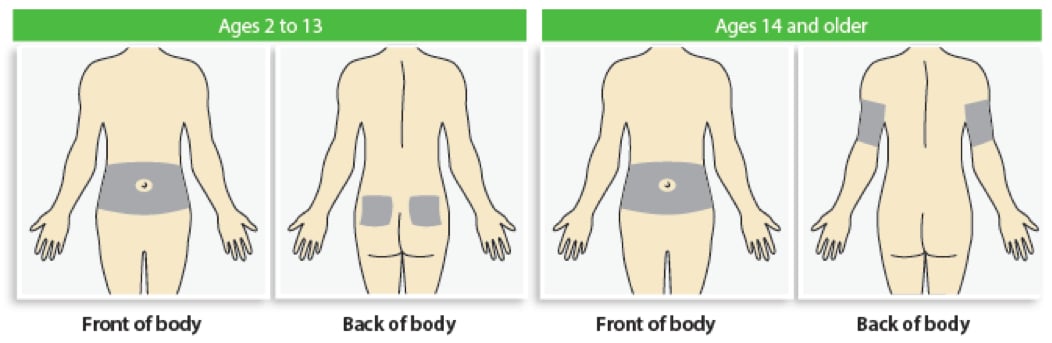
The Guardian™ Sensor 3 has been studied and is approved for use in the following sensor insertion sites by persons of the following ages:
| Approved age | Sensor insertion site |
| 2 to 13 | Abdomen and buttocks |
| 14 and older | Abdomen and arm |
The sensor insertion site should be at least:
- 2 inches (5 cm) from your navel.
- 1 inch (2.5 cm) from your insulin pump infusion site.
- 1 inch (2.5 cm) from any manual insulin injection site.
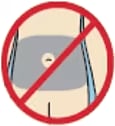
For best sensor glucose performance, avoid these sites:
- Where clothing may rub or constrict (for example, your belt line)
- Where your body naturally bends a great deal and may cause the sensor to pull out
- Where there are scars, hardened tissue, or stretch marks
- Where there is a great deal of motion or friction
To prepare the site, be sure to wash your hands with soap and water. Clean your chosen site with an alcohol swab and allow the alcohol to dry. Do not use IV prep.
Guardian™ 4 sensor
Gather all of your supplies to insert your sensor. After you have them, you will choose a site to insert your sensor. Choose a site that has enough fat.
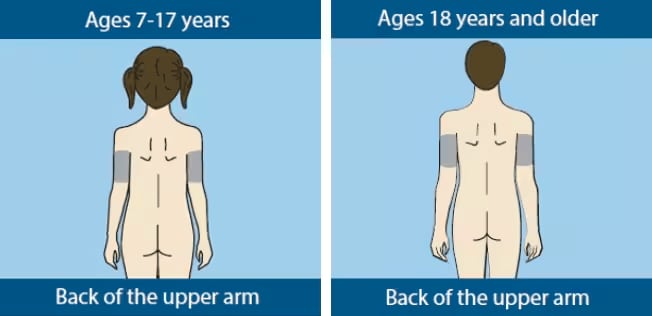
Shown are the recommended body areas (shaded) for sensor insertion:
NOTE: Assistance may be needed for sensor insertion into back of upper arm. Some users found it difficult to insert the sensor into the arm by themselves.
The sensor insertion site should be at least:
- 1 inch away from your insulin pump infusion site.
- 1 inch away from any manual insulin injection site (syringe, pen).
For best sensor glucose performance, avoid these sites:
- Where clothing may rub or constrict (for example, your belt line).
- Where your body naturally bends a great deal and may cause the sensor to pull out.
- Where there are scars, hardened tissue, or stretch marks.
- Where there is a great deal of motion or friction.
To prepare the site, be sure to wash your hands with soap and water. Clean your chosen site with an alcohol swab and allow the alcohol to dry. Do not use IV prep.
NOTE: For insertion sites indicated for your insulin pump system, select the appropriate link below.
Be sure to rotate your sites.
Sensor insertion instructions for MiniMed™ 780G system.
Sensor insertion instructions for MiniMed™ 770G system.
Sensor insertion instructions for MiniMed™ 670G system.
Sensor insertion instructions for MiniMed™ 630G system.
Sensor insertion instructions for Guardian™ Connect system.