Inserting and starting the sensor
Note: To hear the instructions on these videos, make sure the sound on your computer is turned on.
To review the step by step instructions, see the Quick Reference Guide in the Getting Started with Continuous Glucose Monitoring: My Guardian™ Connect System
It is important to make sure that your Guardian™ Sensor 3 is secure.
Selecting Your Insertion Site and Inserting the Sensor
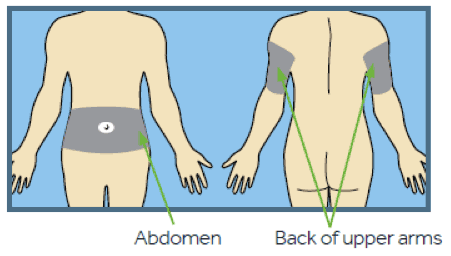
Gather all of your supplies to insert your sensor. After you have them, you will choose a site to insert your sensor. Choose a site that has enough fat on your abdomen or back of your upper arms.
Be sure to insert your sensor at least:
- 2 inches (5 centimeters) from your navel
- 1 inch (2.5 centimeters) from your insulin pump infusion site
- 1 inch (2.5 centimeters) from any manual insulin injection site

Note: Glucose sensors were inserted in the shaded areas of the abdomen and back of the upper arms in clinical trials. You may need assistance with inserting sensor into back of your upper arm. Some users may find it difficult to insert the sensor into their arm by themselves.
For best sensor glucose performance, avoid sites:
- Where your clothing may rub or be too tight (such as your beltline)
- Where your body naturally bends a lot as this may cause the sensor to pull out
- That are scarred, have hardened tissue or stretch marks
- Where there is a lot of movement or rubbing
To prepare the site, be sure to wash your hands with soap and water. Clean your chosen site with an alcohol swab and allow the alcohol to dry. Do not use IV prep.
| Tip for Guardian Sensor 3 Success | Picture |
|---|---|
|
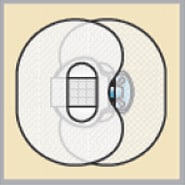
Tip 1: Making sure your Guardian Sensor 3 is secure is important. Check to see that the Oval Tape is applied correctly. Check your site regularly and apply additional off-the-shelf tape if sensor and transmitter are not secure. |
 |
Starting the Sensor
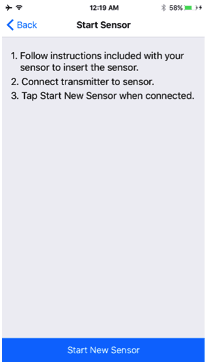
After inserting and taping your sensor, return to your Guardian Connect app on your mobile device to complete the sensor start up. Tap Start New Sensor.

The “Looking for sensor…” message will appear.
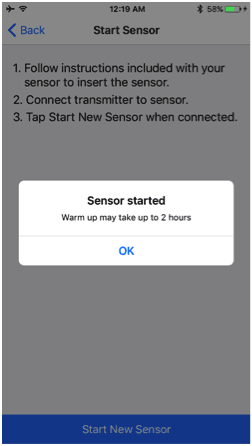
When the sensor has connected, you will see a message reminding you that the warm up may take up to 2 hours. Tap “OK” to continue.

